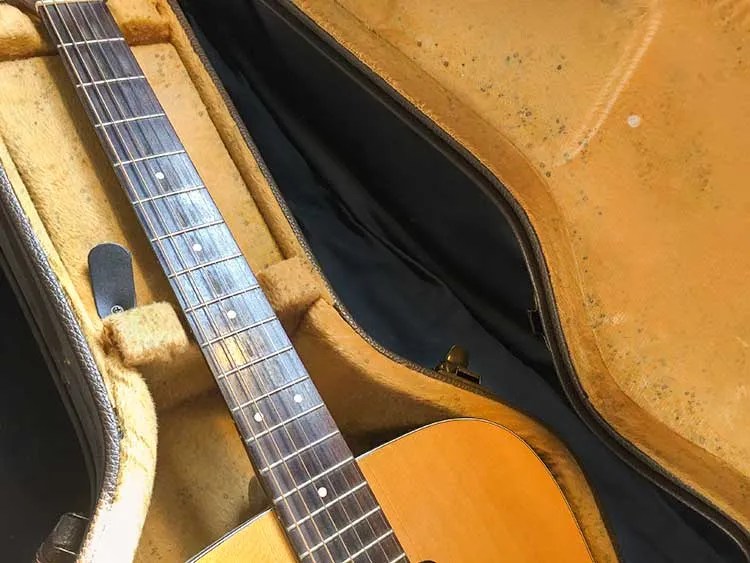
Ask the Expert: The Delicate Art of Fretwork—and Why It’s Best Left to a Professional
Q: At what point do you decide that frets have to be replaced? What are some guidelines you can share regarding frets? What are the consequences of playing a guitar with frets that are too worn? Can frets be easily replaced by the owner, or should that be left to a luthier during normal setup maintenance? Is it difficult to dress frets? Your insight is greatly appreciated.
—Art Bouthot
A: Thanks for the questions—this is a great subject. Fretwork is perhaps the most common job in the guitar repair shop. Whether building an instrument from scratch, restoring a vintage collector’s item, or simply setting up a brand-new entry-level guitar, it’s likely that some amount of fretwork will be required.
When an instrument’s frets are worn, a few undesirable things can result. The first and most obvious is buzzing notes in certain positions. Since very few of us play every note on the guitar equally often, certain frets, typically 1–5, usually get worn out faster than the rest.
For the guitar to play cleanly without buzzes, the tops of the frets must be perfectly level from one to the next. As some get worn away, they end up lower than their nearby neighbors that get less action. Buzzes are the inevitable result. The small divots in worn frets can also make it difficult to bend notes smoothly.

Another problem with worn frets is intonation. The fret scale is carefully laid out and cut to precisely place the center of each fret in the correct position. A difference of a mere ten thousandths of an inch (the thickness of a .010 plain string) can result in an audibly out-of-tune note. As the fret wears, the original rounded crown shape changes to a flat plateau, and the ringing point of the string shifts forward to the front edge of that surface. On larger frets with noticeable wear, this can mean a change of .030 inches or so—more than enough to cause intonation problems for anyone with a well-tuned ear. For this reason, fret tops have to be carefully refiled to an even crown after any leveling.
ADVERTISEMENT
Why does this wear happen? Traditional fretwire is made from nickel silver, which is a mix of copper and nickel (there is no actual silver in the alloy). Strings are made of a mix of alloys—steel, phosphor bronze, and nickel, to name a few. Steel is harder than nickel silver and will eventually win the battle every time. However, even with bronze and other wrap materials whose hardness is a closer match to the frets themselves, the abrasive texture of the wraps will still grind away at the frets pretty effectively. This is why the low-position frets often show clean little scoops under the plain strings, and grooved ridges of wear under the lower strings.
Surprisingly, in some cases the wear pattern can be even enough across nearby frets that they will not buzz despite considerable loss of fret material. I have seen a number of guitars with frets that looked nearly worn through, but still played without noticeable buzzes. For this reason, I generally take a conservative approach to fret work, and only suggest it if the player is experiencing some problem. If there are no buzzes and the action and intonation are reasonable, then I don’t generally suggest a refret or leveling.
In the last decade or so, manufacturers have introduced a couple of new fretwire alloys that are gaining in popularity. Stainless steel fretwire is substantially harder than traditional wire and has been proven to resist wear much better. It is harder to work with and more time-consuming to install, so many luthiers charge a premium for it. Opinions vary among luthiers and players about whether the fret alloy makes a noticeable difference in the tone of the instrument. Some swear that stainless steel imparts a brighter, slightly more metallic tone, while others say that they hear no difference at all.
Another recent arrival to the scene is EVO gold fretwire, named for its distinctive golden color. This alloy was originally developed as a hypoallergenic metal for medical purposes, but has found its place as a good alternative to nickel silver for frets. Its hardness and wear-resistance lie right between nickel silver and stainless, which make it a good compromise of performance and ease of installation.
Now, to the latter part of your question. Though I generally encourage players to take a hands-on approach to adjustment and maintenance, I would recommend caution when it comes to fretwork. Most fret maintenance is a one-way street: You can only remove material, and a little bit of grinding can go a long way.
The first important step is simply diagnosing the problem—if you have a buzzing fret, it could be for a number of reasons: a low nut slot, a high or loose fret, a low fret, incorrect neck relief, and so on. Filing down a buzz is the right solution in some cases, but can actually cause more problems in other cases. Experienced luthiers know that fret leveling is typically the very last part of a setup/adjustment, after all other potential causes of fret buzz have been eliminated.
ADVERTISEMENT

Refretting an instrument has its own set of potential pitfalls. Removing old worn frets can be terribly destructive to a fingerboard if not done carefully. I’ve seen otherwise pristine vintage guitars with horribly chipped up fingerboards from bad refrets. Frets are sometimes simply pressed or glued in, and in some cases, such as vintage Fenders, they were even driven in sideways from the edge of the fingerboard. Knowing how to approach each case will greatly reduce the chance of nasty cosmetic damage. (Sidenote: my cellphone autocorrects “refret” to “regret”, which is sometimes quite appropriate.)
After removing the old frets, a critical step is the preparation of the fretboard surface. Quite often, this needs to be sanded back to a smooth, flat plane. Divots from fingernails can be filled or sanded out, and the fret slots need to be cleaned out and sometimes deepened. If the fingerboard has inlays, this can sometimes be a touchy process—sanding through a pearl inlay is not fun!
The slots themselves are another area where a few thousandths of an inch can really matter. A fret that is designed for a .023-inch-wide slot will feel really tight in a .021-inch slot, and forcing the issue can result in a back-bowed neck. (Consider this: the tiny difference of .002 inches per slot multiplies by 20 slots to .040 inches—quite a bit of extra material to force into the face of a fingerboard.) Clever repair techs sometimes use this compression fretting technique to their advantage to correct bowed necks on vintage guitars without truss rods, but when it’s done accidentally, it can cause real issues. An experienced builder will be familiar with the feel of a well-matched fret and slot and will know if the fret is too tight or too loose.
ADVERTISEMENT
Bound fingerboards require an additional few steps. The tang of the fret (the barbed portion which fits into the slot) needs to be cut or filed back from each end, so the bead (the visible part of the installed fret) can lap over the binding. This takes time and some specialized tools (flush ground cutters, files, and usually some magnifying viewers).
Finally, nearly every refret involves adjustments to the nut slots, and, more often than not, this means a new nut. Nut slots wear down, and often have been lowered following prior fretwork. Fresh frets usually end up higher than old worn ones, and this can mean the nut slots are all suddenly too low.
With all this in mind, I recommend finding a local luthier to do your fretwork. This is bread-and-butter work for any guitar tech, and a reasonable hourly rate is a small price to pay for the accumulated experience and specialized tools needed to do a successful job. A good fret job makes a tremendous difference in feel, tone, and playability, and will feel worthwhile every time you pick up the guitar.
Martin Keith is a luthier, repair and restoration expert, and working musician based in Woodstock, New York. martinkeithguitars.com

This article originally appeared in the May/June 2021 issue of Acoustic Guitar magazine.


