Add a Blues Flavor to Your Rhythm with Simple Chord Embellishments
When you’re playing accompaniment, adding or changing just one note in a chord can do so much to enhance and vary the sound. In the last installment of this series on chord embellishment basics, we focused on sus and add chord voicings, which include the second or fourth of the chord. In this lesson we’ll work with a different set of notes that you can use to add bluesy colors to open chord shapes.
The specific notes we’ll be working with are the flatted seventh, sixth, and flatted third of the chord. As you’ll see and hear in the examples, these notes are fundamental to all sorts of blues grooves and riffs.
Seven Up
First, let’s zero in on the flatted seventh, one of the so-called blue notes, which is found one whole step (two frets) below the root. In a G chord, for instance, the flatted seventh is an F. Adding the flatted seventh to a major chord turns it into a dominant seventh chord, typically just called a seventh chord and written with a 7, as in G7 or C7.
In Example 1, play through a series of seventh shapes for C, A, G, E, D, and B. All these voicings (except the second G7) include the major triad plus the flatted seventh. In the C7, the major triad is C, E, and G, and the Bb on string 3 is the flatted seventh.
ADVERTISEMENT
The example includes a few variations on these chords. C7/G and D7/F# are inversions—they have a chord tone other than the root on the bottom. For A, G, and E, you can play the flatted seventh in two octaves, so I’ve shown voicings that use both. The first A7, for instance, has the flatted seventh (G) on string 3; the second A7 has G on top, on string 1. The example shows three ways to play a G7 that each sound a bit different.
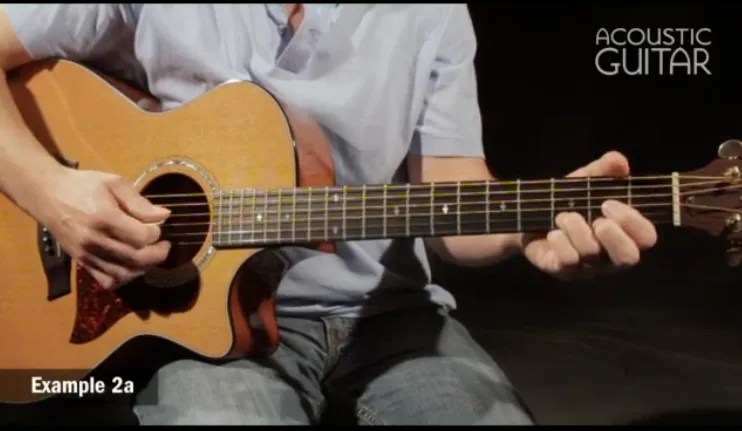
You can use seventh chords like these as substitutions for major chords—in a passage that stays on one chord, you might create movement by switching between major and dominant seventh voicings. Changing from a major to a seventh can work nicely as a transition to the next chord, as illustrated in the first four measures of Example 2. Start on G major and switch to G7 before going to C; then on C, switch to C7 before returning to G. In measures 5–8, change chords more quickly, cycling through a ragtimey progression with mostly seventh chords.
In Ex. 2 and the others that follow, play with a swing feel: that is, play pairs of eighth notes as if they are the first and third notes of a triplet. Check out the video for a sample of what that sounds like. Swing feel is essential to many blues-based styles.
Sixth Sense
Next let’s introduce the sixth, which is a whole step above the fifth (or, going the other direction, a half step below the flatted seventh). In the classic blues shuffle, you play some kind of alternation between the fifth and sixth (and sometimes the flatted seventh as well). Example 3 shows a basic shuffle pattern with two-note chords, in which the upper note switches between the fifth and sixth.
First try the shuffle on E, A, and D. You can loop each measure to practice. The fingering patterns on these three chords are identical—you just shift them over one string from E to A to D. Note the accent marks (>) on the backbeats (2 and 4). Pick these a little harder to propel the groove. Use some palm muting—rest your picking hand palm on the saddle—throughout for a more percussive sound.
On the C and G chords, the shuffle pattern is a little different because in open position, the low root and the fifth/sixth are not on adjacent strings. This means you need to mute a string between them: on C, for instance, mute string 4 by leaning your third finger (which is fretting string 5) against it, so you can play strings 5 and 3 together with the same pick stroke. Though you’re not playing the second string, I recommend fretting it (as shown in the chord grid) just in case you inadvertently sound that string. Play the G similarly, muting string 5 and sounding strings 6 and 4 together.
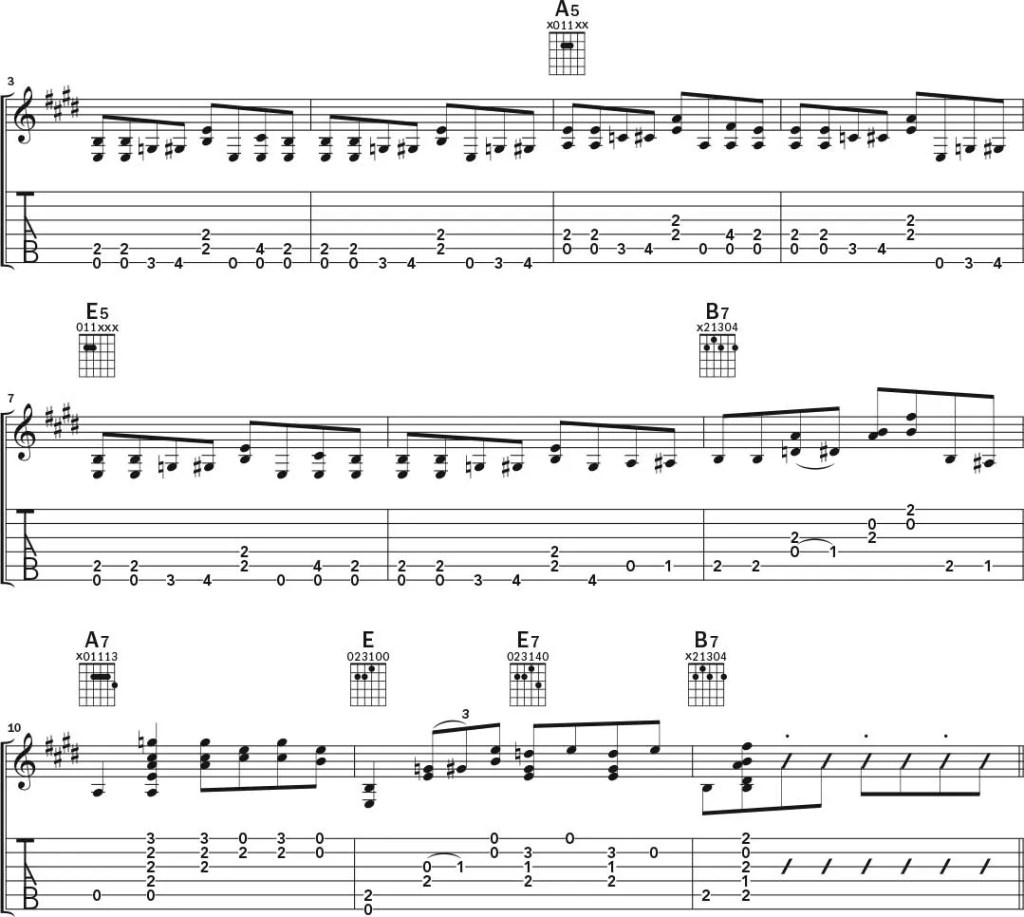
Countless blues and rock songs use variations of this fifths and sixths pattern. Example 4 shows one: the intro to the Beatles’ “Revolution.” Hold down a two-string barre for the A5 and then hammer onto the sixth (an F#). Where you see dots in the notation, play those notes staccato—shorter than the duration shown. In measure 2, strum an E7 for a turnaround, playing staccato notes on the beats.
ADVERTISEMENT
Bluesy Thirds
Now let’s work with the flatted third, another of the blue notes, found one and a half steps (three frets) above the root. In a major key, the flatted third brings in a minor quality; that tension between major and minor is at the heart of blues harmony. In the next set of examples, you’ll use both the major third and the minor (flatted) third to create some classic bluesy embellishments and riffs.
In Example 5, play a simple bass-line embellishment reminiscent of boogie-woogie piano on the E, A, D, G, and C chords. For each chord, the bottom notes follow the same pattern: root, root, flatted third, major third, root. On the E and A, use a first-finger barre so your other fingers are free to fret the bass line. Note that the chord grids in Ex. 5 (as well as 6 and 7) show the fingerings you use at the beginning of the measure—you’ll need to adjust your fingering to grab the other notes.
On an E major and also on a B7, you can find the flatted third on an open string, which allows you to play an easy hammer-on from the flatted third to the major third. Check it out in Example 6: on the E, hammer onto string 3, and on B7, hammer onto string 4. Both of these make great-sounding embellishments that are useful in many contexts.
Put It Together
To wrap up the lesson, let’s play a 12-bar blues in E that brings in all the notes we’ve covered: the flatted seventh, sixth, and flatted third. In terms of feel, this example is in the neighborhood of Stevie Ray Vaughan’s “Pride and Joy,” with a grooving bass line and some spiky seventh chords.
In the first eight bars of Example 7, play a boogie bass line on E and A that builds on the pattern from Ex. 5. At the end of bar 8, walk the bass up to a B. On the B7 and also the E in bar 11, use the flatted third hammer-ons introduced in Ex. 6. In bar 10, play an A7 with the flatted seventh (G) on top, and create a little melodic riff by going between the G and the open first-string E.
ADVERTISEMENT
The examples here just scratch the surface of the embellishments you can create using the flatted seventh, sixth, and flatted third. They are endlessly adaptable. Mix, match, and make your own shades of blue.


ADVERTISEMENT

This article originally appeared in the November/December 2024 issue of Acoustic Guitar magazine.
Many of the teachers who contribute lessons to Acoustic Guitar also offer private or group instruction, in-person or virtually. Check out our Acoustic Guitar Teacher Directory to learn more!


